User Tools
Sidebar
products:promonitor:6.6:userguide:configuration:monitoringprofiles
Table of Contents
4. Monitoring profiles
Monitoring profiles
- The configuration of the monitoring is defined in the profiles
- To monitor a system, simply assign profiles to its connectors
- Default profiles are provided to facilitate the setup of the monitoring, you can visualize them via the menu PROFILES → Select default profiles
- These profiles contains monitors with a default configuration
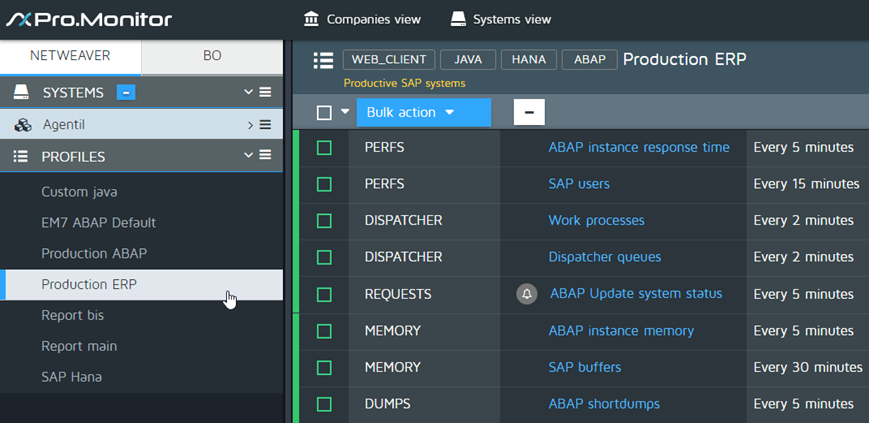
- To visualize the content of a profile, simply select one in the PROFILES section, this will display its current monitors (see image below - step 1 -)
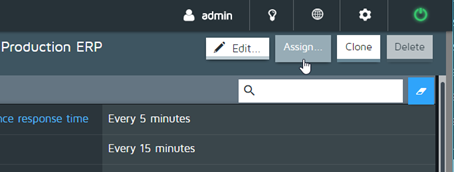
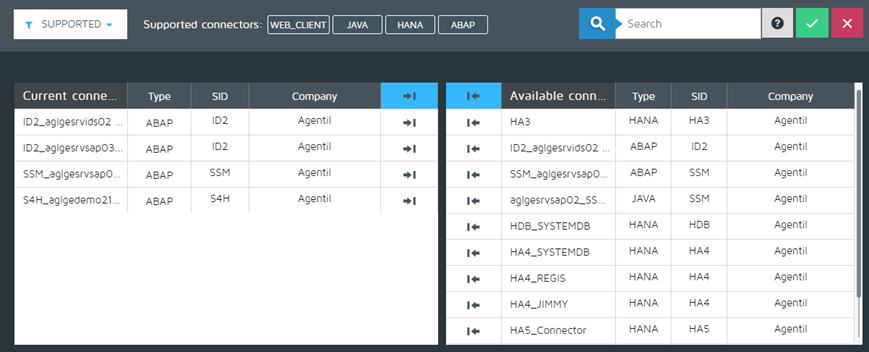
- Use the assign (see image below - step 2 -) button to associate a profile to one or several connectors. This will open a screen (see image below - step 3 -) where you will be able to move connectors from right to left and vice versa. The ones on the left will use the profile
- You can also create empty profiles and defined exactly which monitors you want to activate
Profile customization
- From a profile, you can press the EDIT button to open the list of available monitors (see image below - step 4 -)
- On the right side are displayed the available monitors and on the left, the ones already used in the profile.
- Simply move the monitors left and right to add and remove monitors.
- Warning: If you remove a monitor from a profile, you will loose its customization, and it won’t be used against the assigned systems.
Step 1
Step 2
Step 3
Step 4
/home/clients/8c48b436badcd3a0bdaaba8c59a54bf1/wiki-web/data/pages/products/promonitor/6.6/userguide/configuration/monitoringprofiles.txt · Last modified: 2019/02/04 11:02 (external edit)
Except where otherwise noted, content on this wiki is licensed under the following license: CC Attribution-Share Alike 4.0 International


